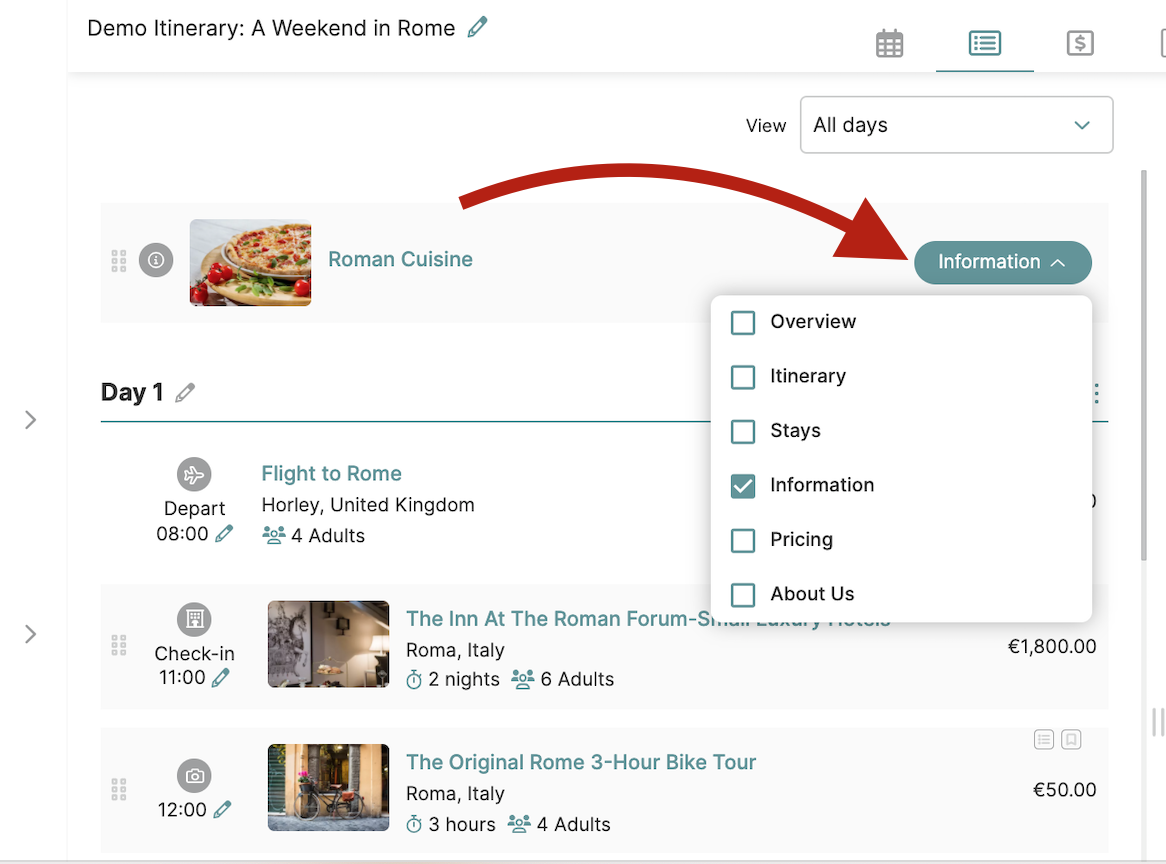
Learn how to display Information and Destination items outside the day-by-day schedule on any selected tab.
Step 1: Create the Item
Add your content under the Information or Destination category in the Products library. You can include as much or as little detail as needed.
Step 2: Add the Item to the Itinerary
Using the planner’s List view, locate the saved item in your library (by searching the title or filtering by category), then drag and drop it into the dedicated area labeled “Drag information and/or destination here” just above Day 1.

Step 3: Assign the Item to a Tab
Once added, open the item's tab menu (on the far right) and select which itinerary tab it should appear on.

👉 Examples of the Final Output
#1 Presenting videos.
Create a Destination or Information item, hide the title in the item settings, and add a video under Images and Videos.

#2 Presenting ideas and suggestions.
Add several Information items to the itinerary. A summarized itinerary view can be created by hiding tabs and other details in the Itinerary Appearance settings.

