This article includes three sections covering each itinerary duplication scenario:
- V1 itinerary to V1
- V1 itinerary to V2
- V2 itinerary to V2
Most importantly, each duplication scenario includes different duplication settings to pay attention to – they determine what data will be transferred. In this article, we will cover the settings for each scenario.
V1 and V2 refer to different versions of TripCreator. V1 is being gradually phased out, while V2 is the latest version. If you're unsure which TripCreator version you’re using, please contact us at support@tripcreator.com.
Scroll down to find the section relevant to your needs.
👉 V1 to V1 itinerary duplication
You would duplicate an itinerary from V1 to V1 if you need to create a new version of an itinerary for the same customer. ⚠️ Important: Please duplicate a V1 itinerary to V2 each time you are creating it for a new customer. All new itinerary projects should be worked in V2.
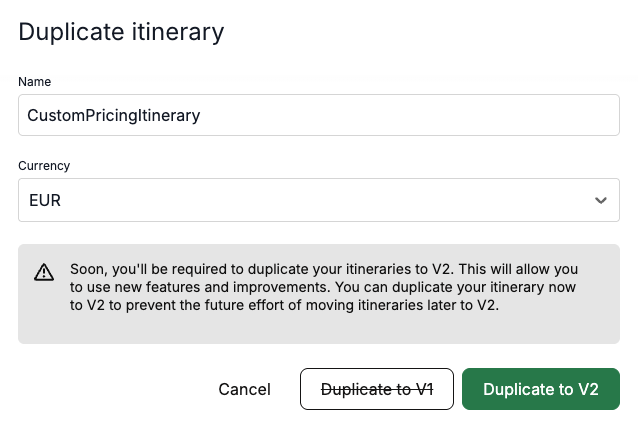
You can still duplicate V1 itineraries in your Dashboard by going to Current and previous itineraries (V1) > selecting the three dotted menu for an itinerary > selecting Duplicate to V1.
DUPLICATION SETTINGS
In the duplication window you can:
- rename the itinerary copy
- change the payment currency for the copy
👉 V1 to V2 itinerary duplication
You would duplicate an itinerary from V1 to V2 when creating itineraries for all new customers (new proposals). This can be achieved in your Dashboard by going to Current and previous itineraries (V1) > selecting the three dotted menu for an itinerary > selecting Duplicate to V2.
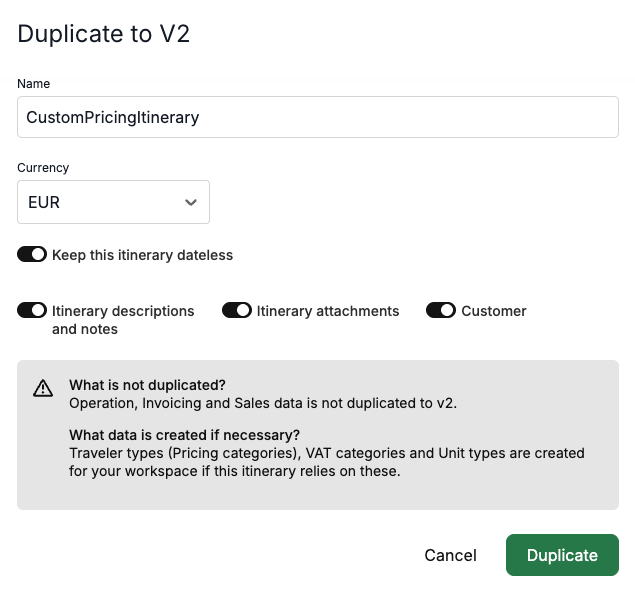
DUPLICATION SETTINGS
In the duplication window you can:
- rename the V2 itinerary copy
- change the payment currency for the copy
- change the itinerary start date
- use the data transfer toggles to select what information is copied to your new itinerary, they include:
-
the option to make the duplicated itinerary dateless
-
itinerary descriptions and notes
-
itinerary attachments
-
customer information
👉 V2 to V2 itinerary duplication
Any V2 itinerary can be duplicated to create a new itinerary version for the same or a new customer.
This is done in your Dashboard by going to New and future itineraries (V2) > selecting the three dotted menu for an itinerary > selecting Duplicate.
DUPLICATION SETTINGS
This duplication scenario allows many choices for you to determine what information you want to include in the new itinerary.
In the duplication window you can:
- rename the V2 itinerary copy
- change the payment currency for the copy
- change the itinerary start date
⚠️ Important: Please pay attention to the data transfer toggles. They allow you to select what information should be migrated from your old itinerary to the new version.
- Itinerary items (always transferred)
- Pricing & product data from inventory –– ⚠️ this is a default setting, which can be switched to Pricing & product data from the itinerary (please see the last section below for guidance on when to use each option)
- Customer data
- Custom day names
- Itinerary attachements
- Presentation images
- Custom tab names
- Itinerary description and notes

👉 Pricing & product data from inventory and from itinerary
You can choose to fetch product rates and other data from the inventory instead of using the rates from the original itinerary created for a different customer.
- If you're duplicating an itinerary for the same customer—e.g. to create a variation—you may want to keep the original itinerary's rates and product data. In this case you would enable the Pricing & product data from inventory toggle.
- If it's a new proposal, you might prefer to fetch updated rates and product data from your Products library. For this purpose you would enable the Pricing & product data from the itinerary toggle.