Invite Agents to Finalise and Send Itineraries Using the Agent Portal
Learn how to invite agents and share proposals through the Agent Portal, where they can customise pricing, apply branding, and send the finalised version to their customer.
Agents are external users with limited access to your TripCreator account. Their role is to sell your itineraries to end customers. Through the Agent Portal, agents can:
-
Review itineraries
-
Add their own branding
-
Add markup
-
Share the itinerary directly with their customers
How to Invite an Agent to Your Account
-
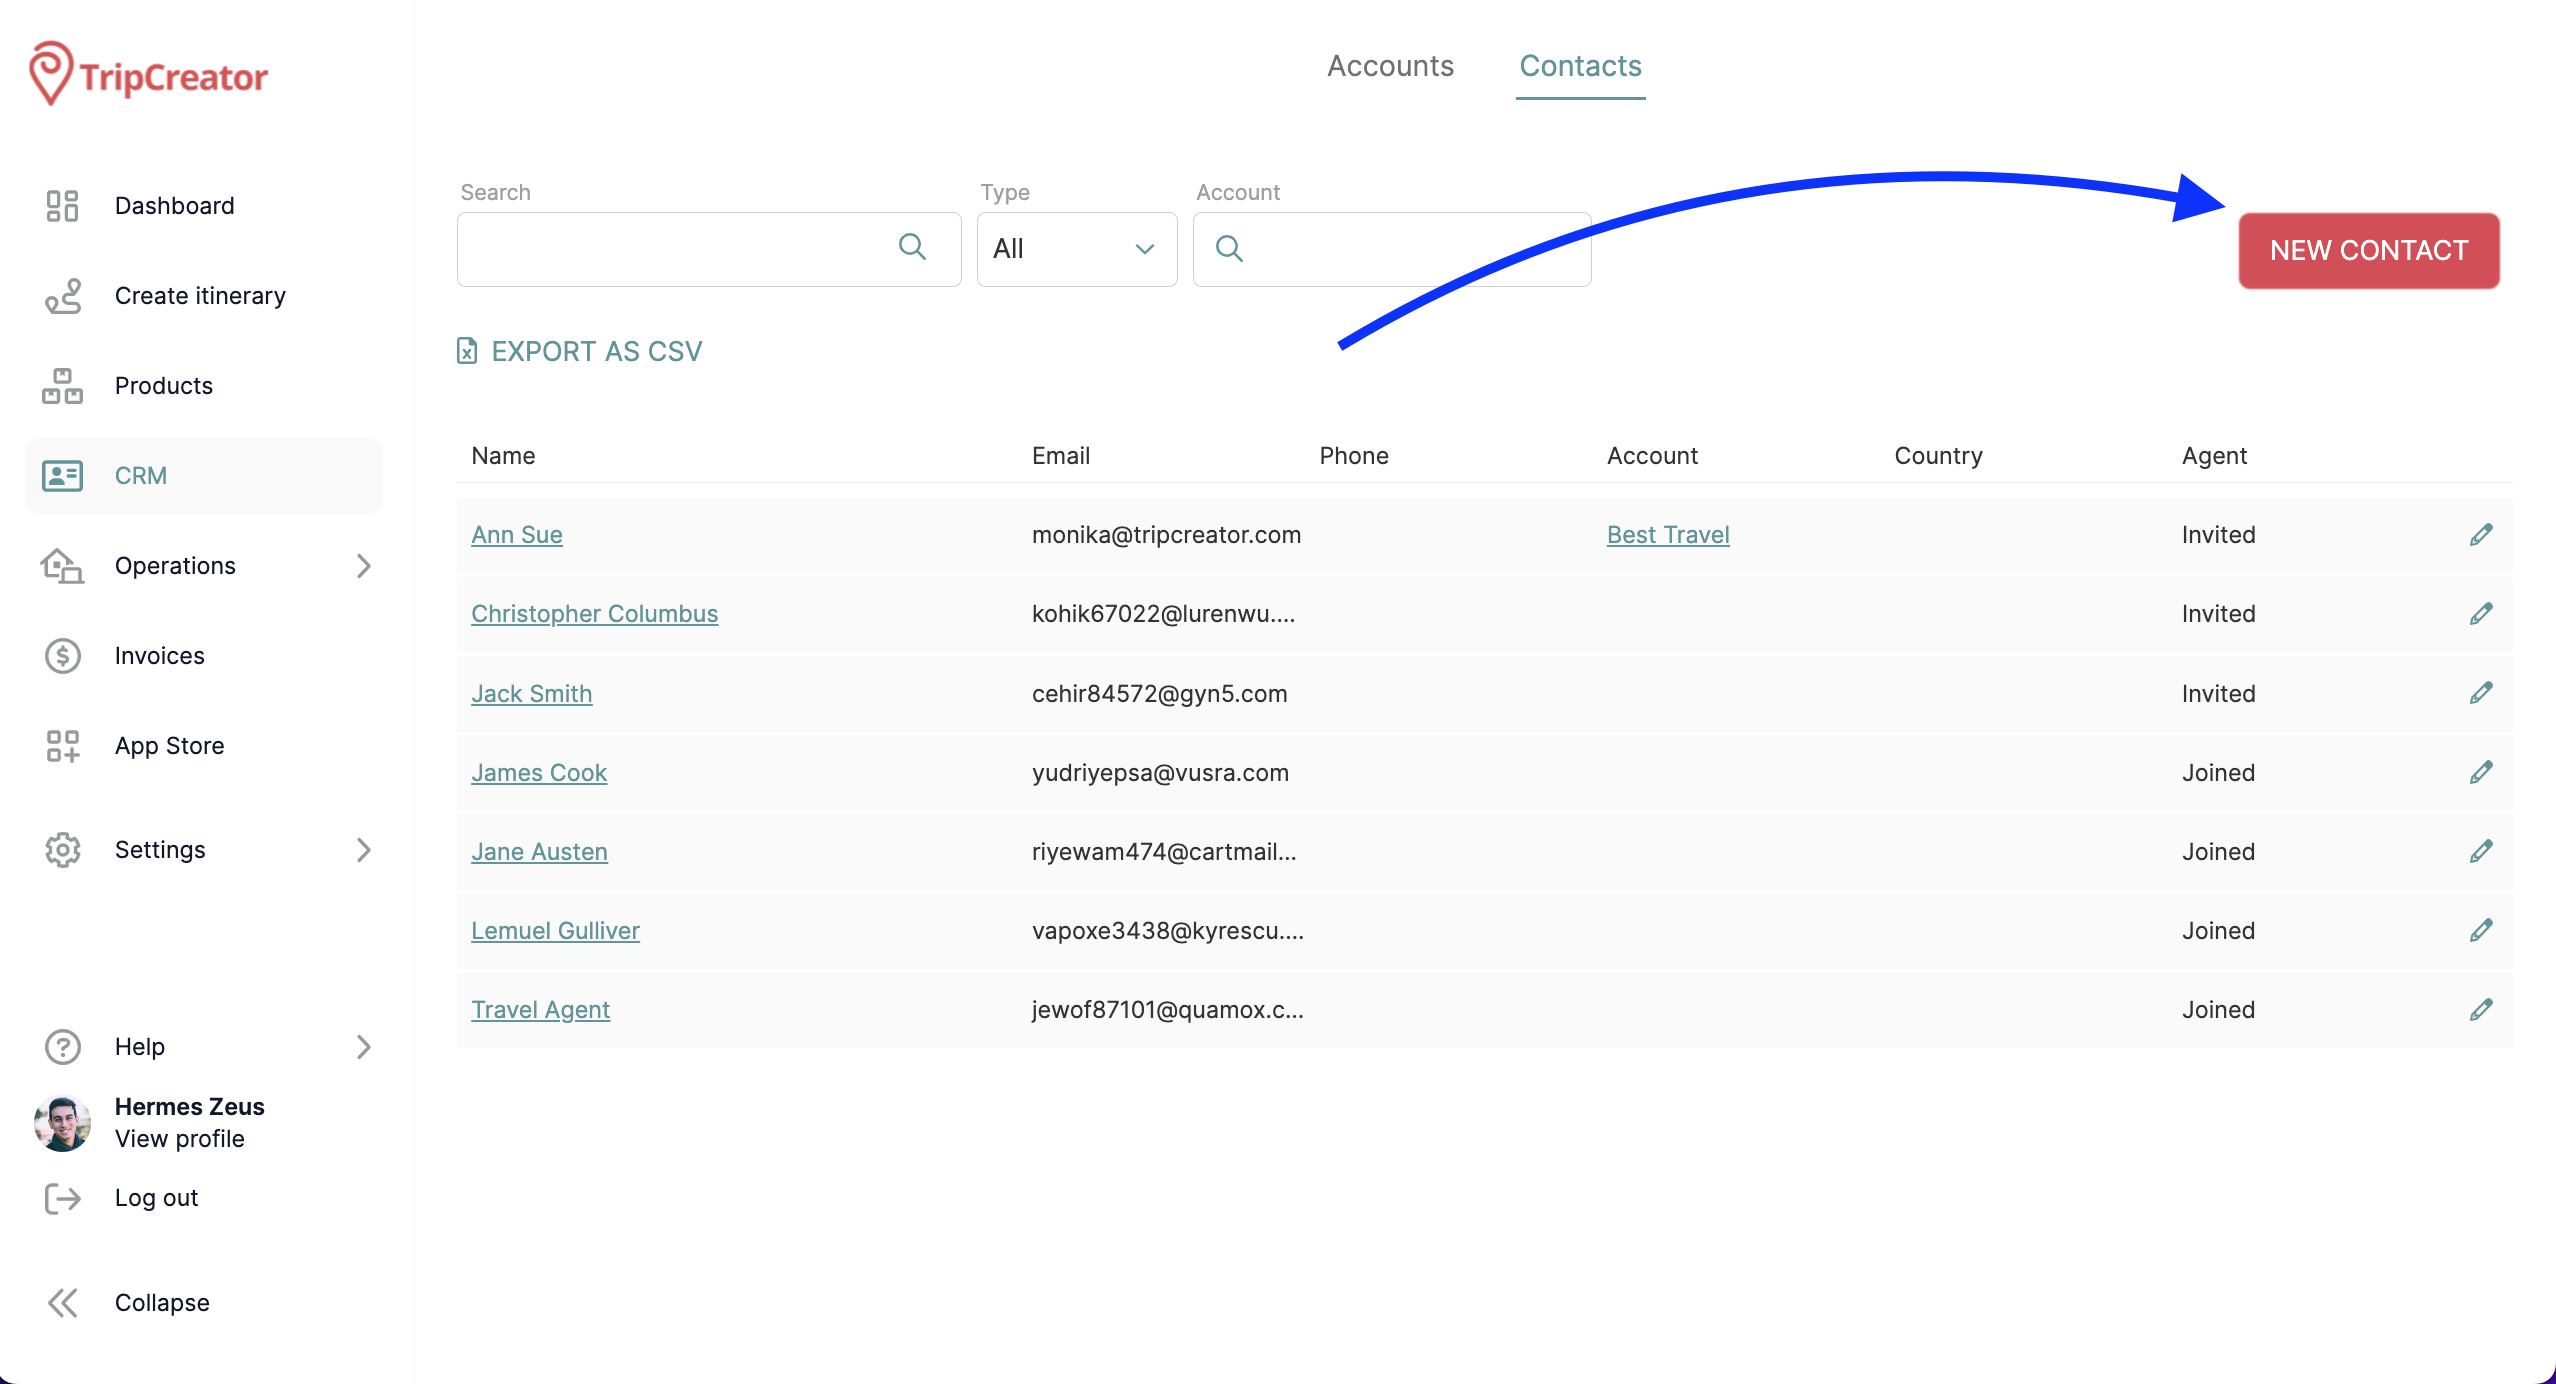
Go to CRM > Contacts, then click New Contact.
-
Fill in the agent’s details and click Save.
-
Reopen the contact and scroll to the bottom of the page.
-
Click Add as Agent.
-
The agent will receive an invitation email with a sign-up link.
-
Once they complete registration, you’ll be able to share itineraries with them directly.
📘 Learn how to send itineraries to agents via the Agent Portal here.
💡 Detailed step-by-step instructions for agents are available here.

