Create CTA button
Create a custom CTA (call-to-action) button and display it on itineraries.
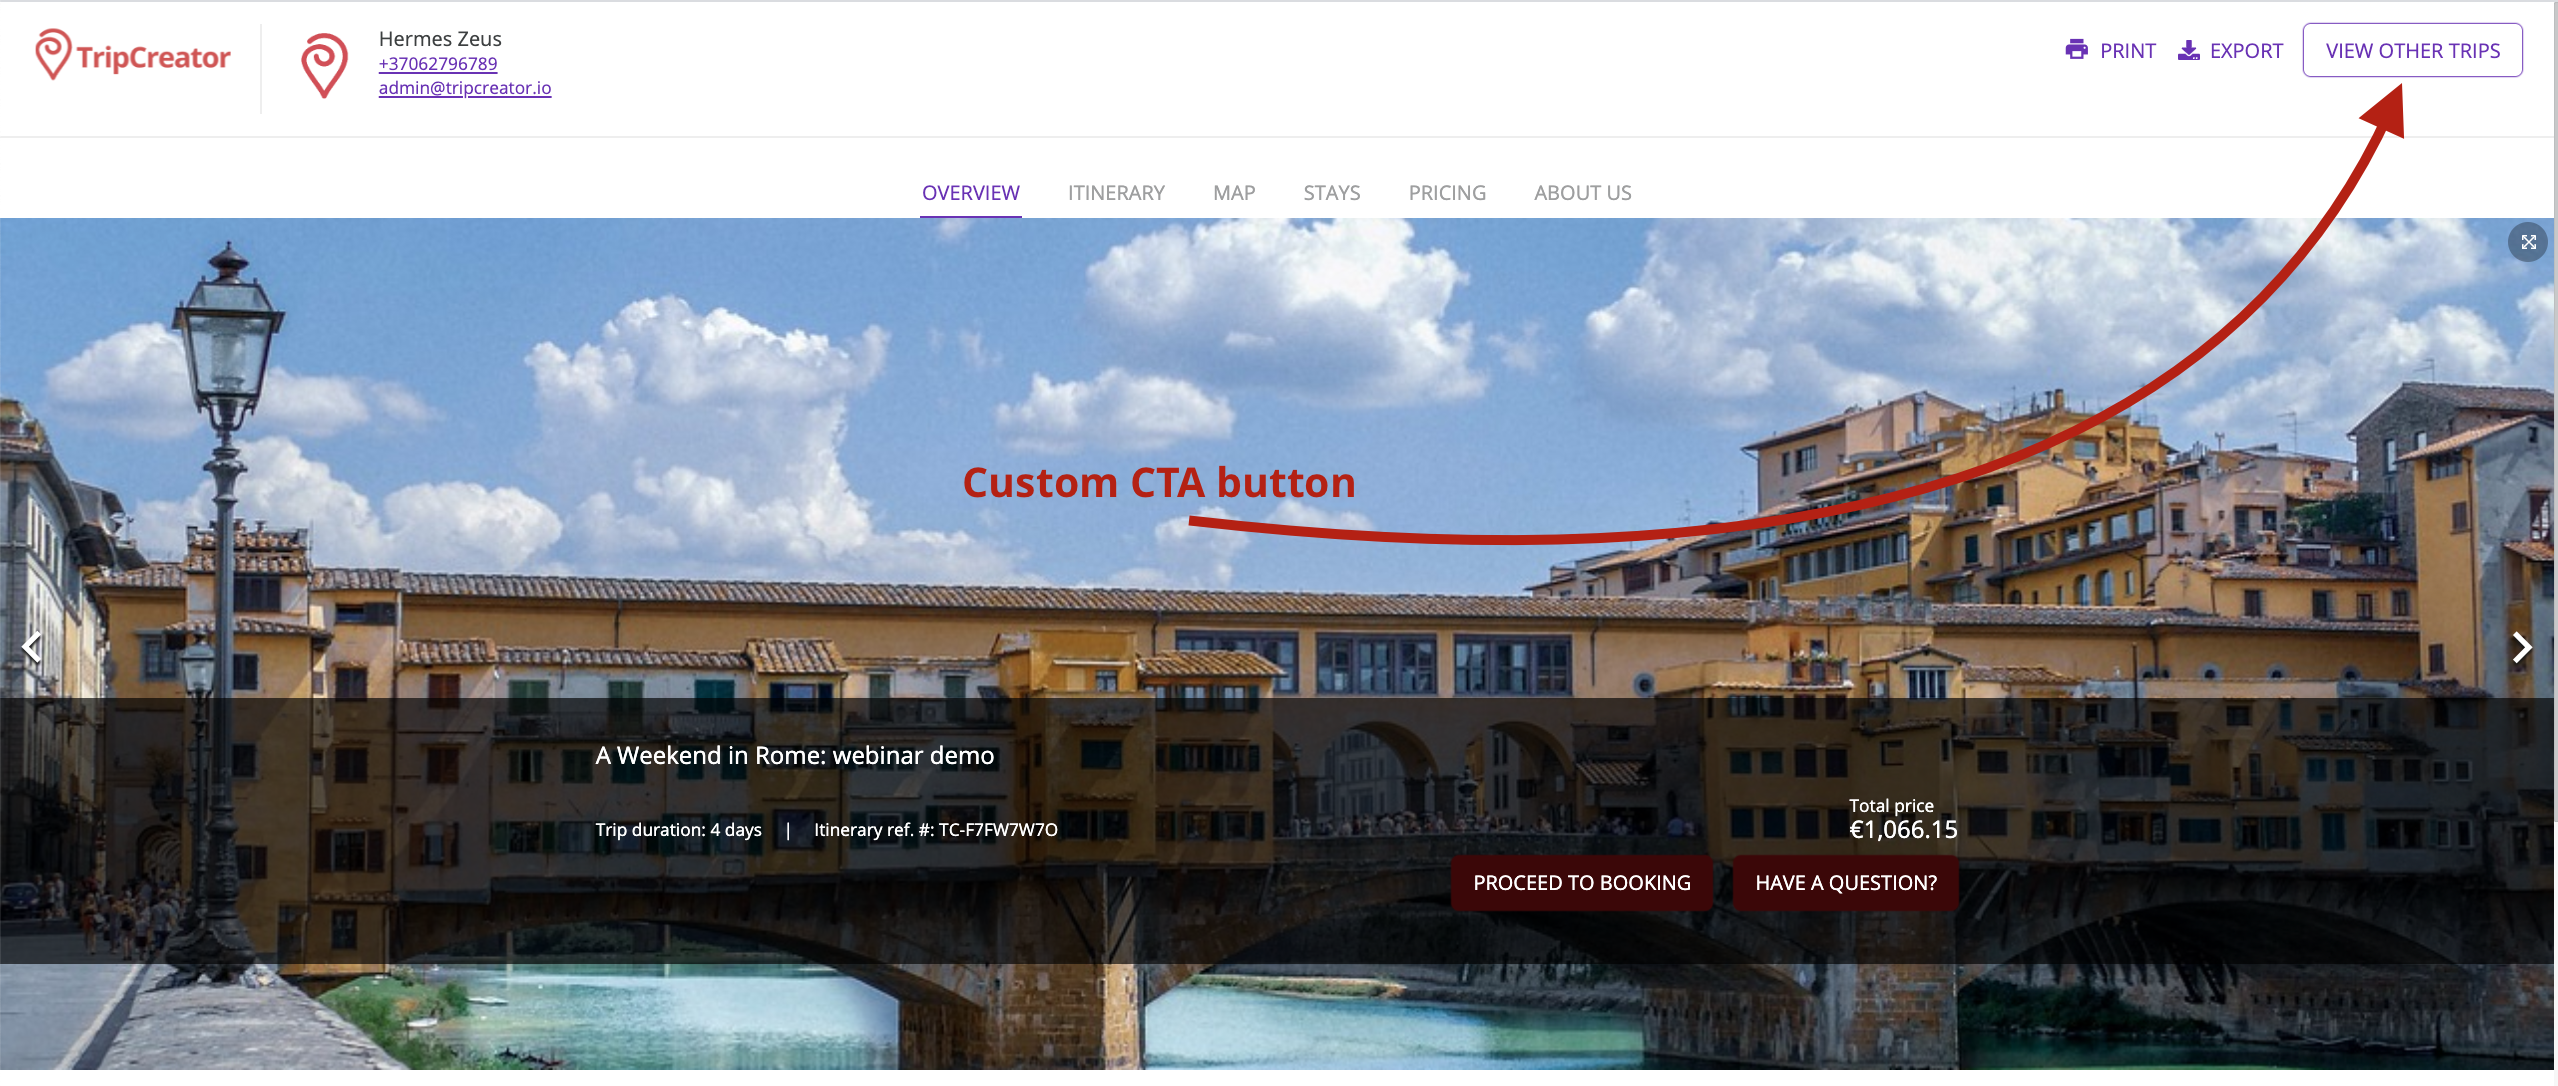
Guide your customers to an outside website page to provide additional trip information or showcase alternative offers by creating a custom call-to-action button positioned in the top-right corner of your itineraries.

CREATE THE CTA BUTTON WITH AN ITINERARY APPEARANCE
Follow these steps:
-
Navigate to your account Settings – General Settings – Appearances.
-
Create a new appearance or adjust one you are already using.
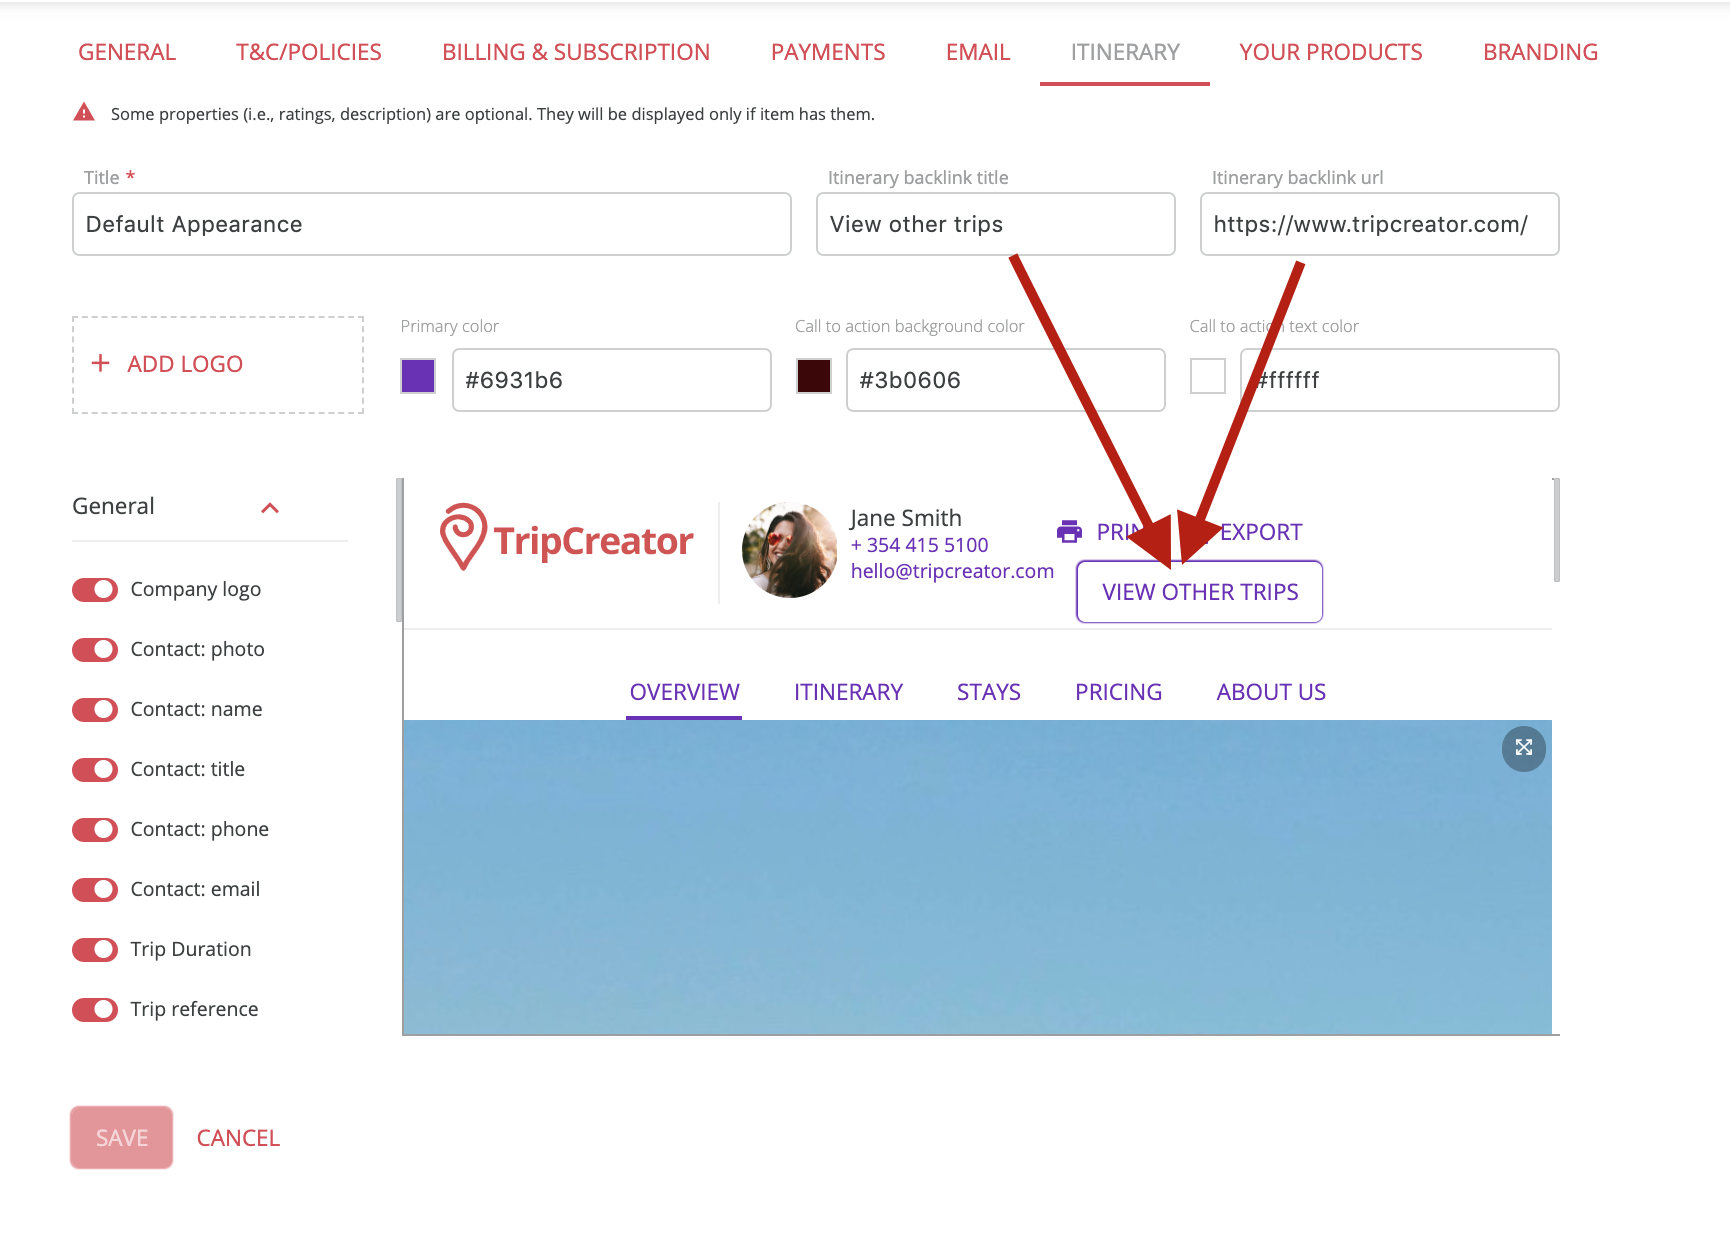
- At the top of the template enter the button name in the Itinerary backlink title field.
- In the Itinerary backlink url field insert the address of the page you want to your customers to navigate to.
NOTE: On the itinerary preview page on the side, at the top of the Overview tab, you will see the preview of your button.
-
Save the changes.
NOTE: To learn more about creating and using appearances, please see this article.
