Assign a Customer to an Itinerary
Learn how to assign customer contacts to your itineraries for improved dashboard overview, faster communication and booking.
Assigning customer contacts to itineraries helps with:
-
having a better overview of customer bookings
-
automatically filling their email in the itinerary sending window, making it quicker to share
-
speeding up the checkout process by auto-filling their contact details during purchase
To assign a customer to an itinerary:
-
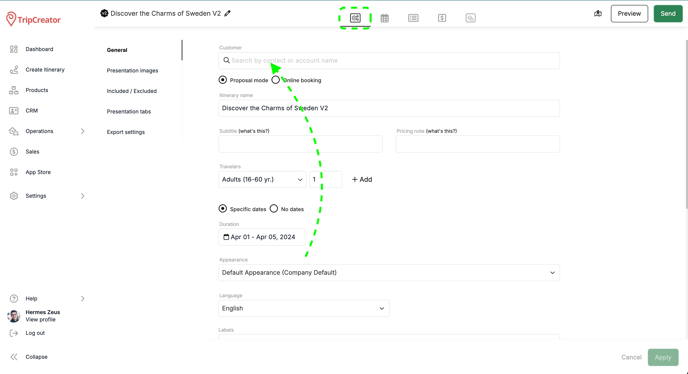
Open the itinerary you want to assign and click the General Settings icon (cogwheel tab) at the top of the builder.
-
At the top of the window, find the Customer field. Search for and select a customer from your CRM.
-
To change the assigned customer, click the × next to the current name to remove them, then select a new customer.
☝️Note: You can easily see which itineraries have assigned customers in the Customer column on your Dashboard.
Itinerary settings – Customer
